Slip Float Basics

During the last few years many fishing magazines have had numerous high-tech articles on float fishing. But while recently thinking about putting some material together for my upcoming fishing schools, one of my golden rules came to mind, “don’t assume anything about what you think anglers know–start with the absolute basics and go from there”.

During my early years or teaching classes I might have thrown around words or phrases like dressing a jig, using a Lindy Rig, backtrolling, structure fishing and so on, thinking everybody knew what I was talking about. But I learned that some neophytes didn’t have a clue what some of those terms meant. The same logic struck me while doing a recent float article–maybe we got into the high-tech before we covered the basics. So with that in mind lets start out on the ground floor.

HOW SLIP FLOATS WORK

Your fishing line slides through a hole in a float (inserted from the top down) until an obstacle such as a knot and/or bead stops its progress. The knot/bead is placed a predetermined distance from your bait or lure to allow you to fish at a precise level, regardless of how deep it is. If I were to hold the hook or jig in my right hand and slide the slip knot (bobber stop) to the tip of my nose, I measure off a distance of precisely two-and-a-half feet. Setting a slip bobber’s depth at ten feet would be four similar measurements or pulls. Fractions of a complete pull can easily be “eyeballed” to give you a little less depth.

The knot or float stop is put on your line first and is always above the float (closer to the reel). There are numerous float stops on the market, from small rubber football-shaped stops to Dacron line tied into a nail knot around a hollow , thin tube. Some hold tight and effortlessly slide on and off your reel–others don’t. I haven’t tried all the stops on the market but the ones I’ve found best are the Thill float stops. They are not made of thick line that easily slides, but of an ultra-thin braided line that clamps down on your line like a vice.

Enterprising anglers can make their own float stops. A good trick is to tie several nail knots with dental floss on a thin hollow tube such as a coffee or drink-stirring straw. When it comes time to rig up a slip float, put your fishing line trough the straw, slide one of the knots onto your line and move it to the desired depth level then pull the tag ends to tighten the knot and trim it as closely as possible to eliminate any line-catching “ears”.

If the slip knot slides through or hangs up in the hole in the float, then a small bead is needed between the knot and float. If the hole through the float is large, which is often a benefit because line (especially thicker diameter line) can more easily pass through it, then a bead larger than the hole in the float must be used as a buffer between the knot and float.


When fishing waters deeper than 4-5 feet, most float fishermen
use slip-floats. They are also good for flipping into tight spots.

WEIGHTING METHODS

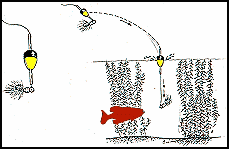
Slip floats are usually fished with live bait or a lure such as a jig or spoon, or often with a live bait-lure combination. Live bait is generally used below split-shot to help “balance” the float. Balancing is using enough weight to make the float stand upright in the water-ideally with most of the float submerged so a fish feels as little resistance a possible (due to decreased buoyancy) when it takes your offering.

Weight placement can be very important. The farther the shot is placed from the hook the slower the bait will fall. Sometimes a slow, natural drop speed is best because your bait lingers at various depth levels longer. This gives a fish that commonly suspends, such as a crappie or trout, more time to look at your offering.

Floats that are pre-weighted and balanced by having a lead band around their base can be tossed great distances. A tiny shot is often used above the hook to keep the float from sliding all the way down to the bait and tearing it. These slip floats are excellent for giving shore-bound anglers extra casting range.

Shot evenly spaced on the line creates the minimum amount of splash and is the shotting pattern that’s least likely to wrap around itself during a cast. Most line-tangling problems can be eliminated by “feathering” the line during the cast. This is simply slowing the lines momentum down just before it hits the water. This is usually accomplished by lightly touching the spool of an open face spinning reel just before the bait or lure splashes down.

When shot are bunched together it’s called bulking the shot. The further bulked shot is away from the bait, the slower and more naturally the bait falls. But sometimes you may want a bait to quickly get to a certain depth level, so you bulk the shot up closer to the hook. This is generally a desirable tactic to get a bait deep fast, to bypass smaller suspended fish or to give you more control over deep snags.

A jig, dressed with live bait or plain, can be used effectively below a slip float. Because the weight (jig head) and attracter (jig body and/or bait) are at the same point, this set up has certain advantages over a standard weighted live-bait float rig. Every movement of the float, whether caused by waves or angler, activates the jig. You don’t have most of the action absorbed by a weight clamped a foot or two above a hook.

A jig adds bulk, color and action to your presentation. My favorite jig for use below a float for crappie or walleye is a marabou-tailed Lindy Fuzz-E-Grub. Swirl-type tails need more action to activate them, while even the gentlest current or wave action causes a marabou tail to wave seductively in the water. In colder water a minnow is often added to the jig for crappies or walleyes, while in warmer weather a leech is tough to beat for walleyes or bass.

BASIC WALLEYE/BASS DESIGNS

When I first started using slip floats for walleyes and bass, wider-bodied, oval-shaped floats with short stems coming off the top and bottom were generally the style used. They could be pulled under by a fish pretty easy, were fairly visible and were less effected by wind drift than the old traditional red and white, hollow-bodied, snap-on, plastic bobbers. I would still consider using this style float for more aggressive fish.

Floats with wider bodies react more to wave and wind action than slimmer-bodied floats. So if I wanted my bait or lure to exhibit the most up and down action, or to drift across a section of bottom in the least amount of time, a wider float would be chosen.

When using an “action float”, a jig or small thin single-hooked flutter spoon such as Bait Rigs Tackle Company’s Willospoon (P.O. Box 44153, Madison, WI 53744) is often used with live bait such as a minnow or leech. If any additional split shot is needed, it’s attached fairly close to the lure. I don’t want the energies of wave and wind to just jig the weights several feet from the lure–this action is meant to be put on your presentation.

Two styles of floats maybe used at the same time until the fish show a preference for a more, or less active presentation. While one float may be drifting and bouncing across a sunken weed bed or rock pile, the other float may present a bait with much less drift speed and vertical action.

The long-stemmed “bodied waggler” style float is capable of presenting a bait with minimal up and down motion and little, if any, drift speed. This style float is the most sensitive to bites, and by using the various styles you can fish depths up to about 30-feet. Sizes 7 and 8 Thill bodied wagglers would generally be used for moderate depths, smaller baits and fairly calm water, while the bigger sizes (10 and 13) are recommended for larger baits, more weight, greater depths and bigger waves.

Just about all anglers have been frustrated at one time or another by our “bobber” being blown back to us or to the side while we were trying to cast with a second rod. Did you even think of why the wind will blow a bobber out of control? This happens because of two reasons–you’re using a fat, buoyant bobber that the wind can move, and much of your line is above the surface where the wind can get at it. To counteract the wind to keep your bait exactly where you want it, use a slim-profile, waggler-style float, then “bury your line” under the surface. Burying your line means casting at least 10 feet past the spot you want to fish, then put your rod tip under the surface and reel fast until the float is directly over the targeted area. When you stop reeling the float will slowly rise to the surface and remain in position because the sunken line is completely out of the wind and under the surface drift.

Center slider are an excellent all-around slip float. They come in a variety of styles from two to six inches in length . Thill Tackle, a division of Lindy-Little Joe (P.O. Box C, Brainerd, MN 56401) has just introduced an extra long center slider called the “Mille Lacs Special” especially designed for big wind-swept waters. A center slider’s slim profile cuts the wind pretty good and fish can easily pull it under. Besides its “all-around” design, this is the best float to use when vertical jigging with a slip float. Longer rods (7 foot or more) and upward lifts are recommended for jigging and more effective hook-sets with this style of float. Setting the hook with a sideways sweep puts too much drag on the float and cuts into your hooking power.

BASIC PANFISH DESIGNS

There are five basic designs of slip floats that I commonly use for panfish, and they are all “Thill floats” made by Lindy. An excellent multi-use is called the Ice ‘n Fly Special. It can be used as a fixed float (non-sliding), a strike indicator when fly fishing, a “pilot float” when used above a float stop to show the direction a fish is running with your bait or as a slip float.


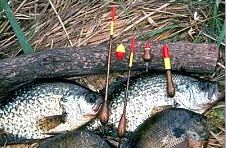
Left to right: stealth, mini-stealth, bodied waggler, Ice n’ Fly, Bodied waggler.
Taller floats are preferred for longer casts or wavier water.

This small oval-shaped slip-float easily slides through weeds, brush, limbs or overhanging grassy banks. I favor it when vertical fishing or making short accurate casts into tough to fish spots. A small jig or ice fishing spoon baited with a pinhead minnow or grub completes this deadly panfish package.

The pear-shaped Mini-Stealth float comes in 6 sizes and will “balance” with weights from 1/64 to 1/8-ounce. A correctly balanced float will have just the red (or chartreuse) tip of this float above the surface, making it very easy for a light biting fish to pull under. This is an excellent slip float to use in shallow to medium depth waters under calmer conditions. If long casts are needed or if there is a good chop on the surface, this small float would be difficult to see. Under those conditions a long-stemmed waggler float would be a better choice.

A Stealth float can be 4 to 5-inches long, while waggler-style floats would generally be from 6 1/2 to 13 inches in length. Stealth floats would balance with weights from about 1/16 to a little over 1/4 ounce ounce. The buoyancy of this relatively short float makes it ideal when wanting to make longer casts in shallower water (5 feet or less). The slim profile cuts through the wind and helps you achieve a more natural, stable bait presentation under windier conditions. The line can easily be buried under the surface with this float to minimize drifting in the wind.

Slim-bodied waggler floats are very buoyant, allowing you to use more shot to balance it. More weight is needed to make longer casts and/or to fish deeper waters. The long slim shape of this float make it very easy for a fish to pull it under the surface. Both Wagglers and the Bodied Wagglers are recommended when fishing water over 5-feet deep, when maximum length casts are needed, and when float visibility is an issue under wavier conditions. These floats are not used in shallower, clear water because their long profile might scare a panfish that has pulled the float under.

Bodied Wagglers come in lengths up to thirteen inches. This makes them visible in big rough waters, whether your fishing for crappies in a wind-swept reservoir or perch on the big, rolling waters of the Great Lakes. More or less weight can be used to regulate the amount of the float’s stem that’s above the surface. Obviously, more stem above the surface will make float watching easier on a windy day.

Don’t be afraid to use a float that’s ten to thirteen inches long for panfish. The amount of wood shown is neutralized by the weight put on the line. While a big waggler-style float may support up to nearly 3/8 ounce of weight, just a thin sliver of wood a couple of inches long is all that’s pulled under the surface. Much less resistance is needed to pull a properly balance waggler under the surface, than is required to submerge an old fashioned red and white snap-on bobber that’s only an inch in diameter.

I hope this information helps you understand the use of modern slip-floats. I know all the shapes and styles can be confusing.

3 Spoon Techniques For More Pike

Getting out-fished by someone in your boat is a humbling experience, but when that someone is a 13-year old, a jaw can get awful tight. At least I wasn’t alone, as his father was also experiencing the same luck as I was having… watching the youngster catch 3-4 pike to our one. I couldn’t figure it out. We were fishing wide, flat, shallow bays that had scattered pike, and after a while, identical spoons were on all three rods. There was no first cast into an area that was best, or some edge the youngster was fishing we didn’t know about. Yet something was going on under the surface that we hadn’t figured out.

The Drop-Back

I began to do less fishing and more looking out of the corner of my eye, scrutinizing the boys every move. Like many young men his age, his attention span was not like an adults, even though he was catching fish. He’d stop reeling to talk, to take a bite of sandwich or drink of soda, to readjust his clothes, or to watch an eagle soar past. Soon it became evident that when his retrieve was halted then restarted, most strikes would occur.

Now things began to make sense, but before deciding to clue his dad in on what was going on, I decided to give the “pause concept” a try. For the next 30-minutes I was
consistently into pike, and after building up a safe lead over his dad (25-cents a pike can add up in good Canadian waters), the secret came out.

What we didn’t realize was that a lot of pike were following our lures, then turning off as they neared the boat. Through the years we found this to be a common occurrence with post-spawn pike that hadn’t really started to feed yet. But this was the late 70’s, and the day when we first realized this was occurring.

When ever the young man stopped reeling the spoon would flutter down, but more importantly, the tapered spoons would backup toward the pike. Most pike were lazily following in a straight retrieved spoon, and would spook to the side as the lure neared the boat. But when the retrieve was halted, (and as we further discovered) the rod tip dropped back towards the spoon, the lure would flutter backwards from 18-inches to 4-feet, right back into a following pikes face. And if there is a best way to trigger a following pike (or muskie) cruising behind a lure into striking, the in their face approach is tops.

The distance a lure will flutter backwards is determined by the style of the spoon, depth of the water, and how the falling, flat spoon planes as it sinks. Try this next to the boat. Have 5-6 feet of line between the lure and rod tip. Move the spoon through the water parallel to the boat’s side, then stop and drop the rod tip back towards the lure. This gives the lure some line so it can back up the maximum distance. Clear shallow water will give you the best view of how the drop-back works. The best drop-back spoons I’ve used are the size 6 Lindy Gator Spoon, Eppinger TrollDevle, and the 1-ounce standard Dardevle.


The Drop-Back technique is a great way to trigger following pike.

Summary: Whenever casting spoons for pike, especially if conditions are tough, try dropping the lure back several times on each retrieve. This is a good technique to practice whenever casting a spoon.

Jig-Trolling Spoons

The weed bed was immense, probably 12-15 acres. And it consisted of leafy, cabbage weeds, with much of the growth in the 9-12 foot depths, a condition that usually causes the pike to cruise in and out through the open water between the clumps looking for food. This sprawling mass of vegetation could take some time to fish, since there was no wall-like edge that would tend to concentrate numbers of pike, and so much of the weed bed looked like perfect pike habitat.

When normally confronted by a big weed bed with lots of potentially good-looking water, trolling usually allows me to quickly check it. I would commonly run bucktails, big spinnerbaits, or shallow-running jerkbaits over the top, and deeper-diving jerkbaits and crankbaits along the edge. Fifteen minutes of trying some of those techniques quickly showed they were a waste of time. Here was the problem. Weed growth was very inconsistent, sometimes it came to the surface, other times it was 3-4 feet below. Lures that ran at a specific, near-surface depth level would constantly foul up in the erratic growth.

My next option would be to run a spinnerbait or buzz-bait across the surface. But what tossed this plan for a loop, was that hundreds of dark, shadowy weed pockets existed throughout the vegetation. And due to the bright sky conditions, light winds and fairly clear water, you could sense the pike were holding in those weedy lairs. But there had to be a way of rooting them out, and I didn’t intend on wasting hours of time casting to all those potential fish-holding areas. I had to figure out a fast way of working those weeds.

If the weed bed was smaller, I would have probably jig fished it with plastic-bodied lizards, reapers, big double twister tails, Sassy Shads, or other types of soft-bodied “creatures.” At least these presentations would penetrate down into the weeds, and the single hook on the jig would allow me to snap and rip through any clinging vegetation.

Finally I had an idea, why not try a Johnson Silver Minnow, but instead of casting with it troll with varying speeds in a lazy S pattern. This prevented the lure from following the boat’s path. When turning toward the lure it would sink into the weeds, but as the boat swung the other way the lure would be on the outside of the turn, going faster and swimming out of the weeds. The method worked like a charm, as the spoon was actually being jigged down into the weeds, then pulled out, while the boat was constantly moving over new waters in the search for pike.

Since this experience occurred 6 or 7 years ago, I’ve had excellent success with this technique, rooting many pike out of weedy cover that would not come up for a high-running, more horizontal presentation. But there are certain things that must be done for maximum success.

The plated hook on a Silver Minnow is dull and must be sharpened along the sides and tip with a fine grain file. South Bend makes a great one. Adjust the weed guard so it lines up with the hooks tip and extends out a little past it. If the hook point and weed guard aren’t in a straight line, you’ll grab a lot more weeds. Don’t adjust the wire weed guard too far out from the point or it will be too hard to set. Adjust the setting according to the density of the vegetation.


Trolling silver minnows gives you a great way to cover
massive weed beds and to get down into the vegetation.

My first attempts at setting the hook, while making turns with stretchy, mono wrapped around weed clumps, were disastrous. Most hook-ups on larger fish occurred after quickly gunning the motor to pick up line as the hook was being set. As the technique evolved , here’s what I found to work best. Use no-stretch super line such as Berkley WhipLash or FireLine. Don’t use a shorter rod or one that doesn’t have backbone. A muskie “bucktail rod” that’s at least 6 foot 9 inches, or a sturdy flippin’ stick are recommended for maximum hook-setting power. Longer rods give you a long, sweeping hook-set that picks up slack line, they also keep the lure a little farther from the boat, plus they aid in controlling and playing pike.

Dress the Silver Minnow with pork or plastic. A dressing’s length and bulk will alter how fast or slow the spoon will wiggle or sink. Be careful not to use a soft plastic dressing that slides up on the hooks shank every time a sharp forward rip is executed to clear weeds. Gluing some plastics to several spoons with a “Krazy” glue can solve this problem. The standard silver-colored “Silver Minnow” is a must, but gold, perch and fire tiger can also be hot, especially when the water has some color, or darker skies exist.

Summary: When faced with lots of weeds, trolling can help to quickly find the pike. But be careful not to go too fast in a straight line. A soft zigzag pattern allows the lures to constantly sink down and be pulled out of the weed clumps. It’s this “jigging action” that roots out the big ones!

Flutter Spoons

When game fish are aggressive, fishing fast and horizontal is often the best way to cover water and catch the maximum amount of fish. But as the action starts to decrease, slower speeds and lures that fall, flutter or pause usually become more productive. A slower falling lure may also be more effective on suspended fish, or those holding tight to cover, as it gives them a little more time to zero in on the presentation.


Wafer-thin “flutter spoons” like those used for trolling salmon and trout
are slow falling with a lot of flash that trigger non-aggressive pike.

Anyone with basic pike fishing experience knows that spoons are tops for these toothy predators, and we’ve already discussed two deadly tactics. But the ultimate “tease” technique, the tactic that temps even the most tight-jawed pike into hitting a spoon, is the one that gives us the slowest, falling, most tantalizing action. This involves casting with super-light weight flutter spoons, those wafer thin spoons that are usually trolled in deeper water for trout or salmon while using weights or planer devices to get them down.

Before going out and trying to cast these spoons on baitcasting gear spooled with heavy line, three words of advice-don’t try it! They are best fished with long-handle spinning rods that are at least 6 1/2 to 7 feet long, and a reel full of soft 10-14 lb. test mono such as Trilene XL, or better still 14-20 lb. test FireLine. Two handed “snap casts” are recommended, where a right-handed caster pulls the butt section of the rod sharply towards his body with the left hand, while the right hand fires out the cast. This tactic increases rod speed to give extra casting distance. Look at a South Bend System 9 IM6 graphite spinning rod I designed (P-246) to get an idea of the type rod to use. A ball-bearing, wide-spool spinning reel with a tapered spool works best.

Flutter spoons have a lot of flash and movement with a minimal amount of forward or drop speed. You can slow the frantic fluttering action down a bit by adding a plastic or pork trailer, but I rarely do.

These spoons won’t let you cover a lot of territory, but they are deadly under certain situations. One of them is when sight fishing for pike. Although this may sound easy it’s not. In stained waters only slight shadows or dark spots on the bottom may be noted. In clear water the fish can more easily be seen, but a cast made too close will usually send them bolting away. Always cast at least 10-15 feet past the pike, and not directly over it. If the fish is moving, cast well in front. Even if you lead the pike too far, let the spoon sit on the bottom until the fish is within 5-8 feet. The lift up and allow the spoon to flutter downward. Sometimes the pike may just watch the lure sink, and nose up to within inches of the lure. Short little jiggles or soft “pops” will usually provoke a strike.

A flutter spoon can also be rigged on a follow-up rod. When a pike follows in a faster-moving, more horizontal presentation then turns off, a flutter spoon can be blind cast in the direction the fish headed. Let it sink 5-6 seconds pull it upward, then repeat. This slow-falling, crippled action is often different enough to trigger a response.

Flutter spoons also work well when allowed to sink into larger holes in a weed bed, or into the shaded areas between higher clumps. Let the light lure slowly flutter down into the pocket a few feet, or down between the clumps, then left the rod to pull it back out. These thin spoons sink much slower than a conventional spoon, and have a wilder, flashing action. This attracts pike and gives them plenty of time to react to the slow falling lure.

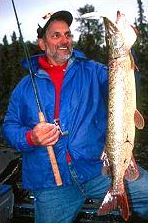
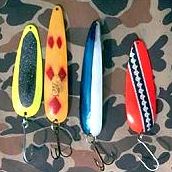
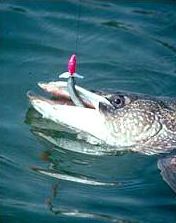
When fishing flutter spoons around weeds, use one with a large single hook, and put the hook on so the point faces the inside or cupped side of the spoon. This rigging will give you the minimum amount of weed snags and make releasing pike easy. With a little practice this single hook spoon can be cast over thick vegetation and skittered across the top, periodically stopping the retrieve so the lure flutters down into holes or along edges. The trick to avoid hanging weeds is to halt the lures flight just before it hits the water by engaging the reel and lifting the rod tip.

Wire leaders should be used with all the spoon techniques discussed. Always use a quality ball-bearing snap-swivel to the lure. A size 4 Berkley Cross-Loc snap swivel is ideal. When casting a spoon, either with the drop-back technique or with a flutter spoon, a 12-inch leader is perfect. When trolling with the Silver Minnow, where a lot of pulling and ripping of weeds is going on, a 3-foot leader is better as it will slice through the vegetation and won’t weaken. Put these 3 techniques in your pike-fishing bag of tricks and watch your catches soar!

Bass in the Slop

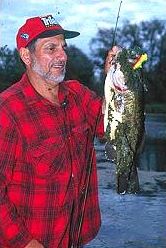
Years ago I would have left clearer and/or shallower lakes during hot, bright days-now I thrive on these conditions!

You’re bass fishing on a shallow, clear lake. It’s after 9 a.m. and the hot sun is blistering the waters. All aquatic movement seems to have come to a halt. You haven’t had a strike since the sun crept high enough to penetrate into the water. Time to go home? No way! You’ve got those bass right where you want them-in isolated areas of thicker cover.

Tens of thousands of lakes and ponds across the country have conditions that cause the bass to move shallower during hot, bright conditions. These waters often lack depth, plus they generally have little or no structure or cover below the level of light penetration. Bass usually seek refuge under the thickest light-stopping cover they can find. The cool, shaded, oxygen-rich waters under a heavy canopy of surface cover draws bass like a magnet. Plus the shaded area provides a perfect feeding situation where bass can feast “high or low” on frogs, small fish, crayfish or anything else that will fit into their large mouths. Fishing surface-blanketing cover for bass can be very productive and exciting. Surface explosions that toss floating algae, weeds and other assorted “goop” in all directions will really get your heart pumping. And when you hook a large bass it turns into more of a tug-of-war rather than a battle.

The best conditions for working surface-blanketing cover is on shallower, flatter lakes, or in shallower areas of larger bodies of water. I’ve also seen this pattern hold up on ponds, in the back ends of coves in reservoirs, bay areas in lakes, along debris-laden outside bends in slower moving rivers, even around floating bogs.

The various forms of light-stopping cover are often most productive when fishing on that particular body of water slows down. Sunny conditions usually put bass under the cover, while under lower light conditions (early or late, cloudy days) the fish tend to roam the open water or edges

OVER THE TOP

I learned the significance of floating goop to bass over 30 years ago. An old timer fished several lakes and ponds I also was working, and news of 5 to 8-pound bass he was catching out of northern Illinois waters trickled down to me. The unusual part about it was that he was going fishing when others were coming in. “The hotter the better” was his motto and he had the bass to prove it.

On several occasions I observed him fishing. He worked the thickest floating slop that collected or grew in corners of the large, clear strip pits we fished. Long casts were fired within inches of shore, and with his long spinning rod held high, he would skitter and slosh a metal spoon across the surface like something was chasing it. When he got to a pocket a brief pause would occur. And when an edge was encountered, the spoon would be allowed to flutter down several feet. Bass were usually hooked on the pauses, as it was hard for them to zero in an the fast-moving spoon.

This new found information swelled my head with new ideas. My warm weather bass fishing the next two summers pretty much revolved around where this technique would…and wouldn’t work. I remembered that several heavily fished trout ponds that charged a daily fee had a few small weed choked pockets (remember, I was barely an adult at the time). Bang, a 2 1/2 and 5 pounders the first time, plus several more missed fish. I was hooked.

Through the years the “skittering technique” has been fine tuned, even to the point where a spoon is not my main lure for fishing over light-stopping cover.

The best conditions for fishing over surface cover is when limited amounts are on a shallower body of water. A lot of cover will scatter bass, while isolated patches on a lake that has sparser, deeper weeds and/or wood, will hold larger concentrations of bass. Sunlight and heat are your friend, as these conditions drive bass under a canopy of cover that offers cool, oxygen-rich water and a smorgasbord of forage.


Snag Proof’s oversize frog called Frogzilla
is noted for tempting oversize bass.

My number one approach for fishing over the slop is with a variety of hollow-bodied lures such as those made by Snag Proof. I pick certain lures to match weed conditions, pound test, length of cast needed and activity level of the bass.

For example – lets say the waters I’m working has an abundance of floating cover. The object is to fish as fast and effectively as possible to develop a pattern. Are the bass tight to the bank, in the middle, or near the edge of the cover? Do the best areas combine with wood, or have big holes, small holes or secondary cover to intermingle with the “goop” to make it better? Is wind a factor? Slight current? And so on.

To cover water with longer casts and speedier retrieves, I use a heavier Snag Proof lure such as the Frogzilla with 30 to 50-pound test superline such as Berkley’s Whiplash. Another option is a wide-bodied spoon. A wider spoon will stay on top with slower speeds-and make sure the hook sits far back on the lure to give you better hooking power.


The cigar-shaped Weed Demon is perfect
for working over the top of patchy surface cover.

The frog or spoon is preferred over consistent cover, and in cover that has numbers holes and pockets IF the water is fairly clear an not more than 3-4 feet deep. If the water is stained, (the bass can’t see as well) or it’s deeper (they need more time to react), my choice of lures would be a floating weedless lure that can be “popped” in the openings to attract the bass. The choices would be Snag Proofs Tournament Popper, for use with heavier lines.Lighter weight lures such as Snag Proof’s Skirted Frog and Hawg Dawg are cast with a 7-foot spinning rod and a long cast reel filled with Berkley FireLine in 14 or 20-pound test. I designed a 7-foot IM-6 graphite rod for South Bend (System 10) that’s ideal for this tactic, in addition to having numerous other uses.

If the bass aren’t running too big, or your having trouble hooking fish that have taken the lure into their mouth, there a several things you can do. Switch to a Skirted Frog or a Hawg Dawg. The frog has a skirt instead of rubber legs behind the hook, which seems to aid in hooking fish. And the slim profile of the lizard-like Hawg Dawg also gives you excellent hooking power. I’ve also taken a number of large crappies on the Dawg under low light conditions when worked over heavy weeds with short twitches.
Other tips are use a lure you can easily see, such as one that’s white, chartreuse, hot pink or yellow, and don’t set the hook until the color disappears. Quality, low-stretch lines such as Berkley’s WhipLash on baitcasting outfits, or FireLine on spinning outfits, will aid in obtaining more solid hook-sets, and in controlling a bass in heavy cover.


The Lizard-like Hawg Dawg is used on lighter tackle
and is able to settle into holes in the vegetation.

Often a two lure approach is used when fishing over surface cover. A fast lure like the heavier frog or spoon is used to stir up bass action, while a slower, back up lure is quickly fired back to the area of a missed strike. Good back up lures are the light weight, hollow-bodied lures mentioned, 6-inch Slug-Go (if a slow sink into a pocket is desired), and a Jumbo Uncle Josh pork frog on a big weedless hook.

Various types of surface blanketing cover may exist. Heavy algae or goop should be worked slower to attract bass below, while areas with multiple pockets, holes or slots can be fished a little faster, until you get to the openings. Also watch out for falling water conditions that will cause high growing weeds to lay over as levels drop, forming a canopy of surface cover.

UNDER THE SLOP

“How in the heck are we ever going to get a bass out of that mess, “I asked our guide Dave Daub, as we pulled up to a mass of floating hyacinths on Florida’s famed Rodman Reservoir. Daub, a legendary guide known a big bass specialist , had a twinkle in his eye that assured me that he’s “been there and done that” many times in his illustrious career. I still worried about getting through that mess.

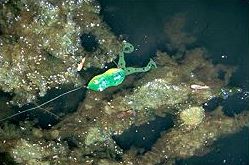
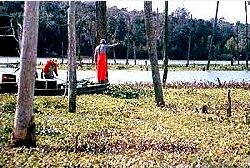
We double anchored about 10 feet from the edge of the floating plants where they formed a deep, open pocket. Daub pulled a long-handled, extra stiff baitcasting rod out of his rod compartment, grabbed a lively shiner out of a bait well, and hooked it underneath, just behind the anal fin.

“Now watch how this is done”, Daub instructed. With the bait dangling about 3-4 feet below the rod tip, Daub swung it in a pendulum motion and gently launched the bait toward the edge of the floating vegetation. Just as the wiggling shiner was near plopping down inches from the vegetation, Daub stopped the bait in the air.

“What did you do that for?” I kidded, “Did you make a bad cast?”

“No, I tightened the line for a reason,” he said with authority. “When the baits airborne progress is stopped just before it hits the water, it points the tail-hooked shiners head towards the weeds. The baitfish will usually swim in the direction it’s pointed after hitting the water. And I want it to swim under the ‘safety’ of the weeds.”

After the baitfish hits the water they’ll usually swim anywhere from 1-5 feet back under the floating vegetation. If a bass hasn’t grabbed them by then, let the bait rest a minute or two, then gently twitch the line a few times. This tactic usually spooks the shiner, causing it to go even. further back under the weeds. If you’re in a good area, most shiners will be attacked by then.

Your baitcasting reel should be filled with at least 20-pound test, high visibility line such as Berkleys XT Solar or Golden Stren. A wide spool reel such as a Garcia 6500 is best because line peels out easier than it would on a narrow, deep spool, and is less apt to momentarily hang up, which usually causes a bass to drop the bait.

Visible line allows you to easily follow the shiners path, and when the line really starts peeling out a bass has grabbed the bait. Screw the drag down so it’s hard to pull out. After you engage or “click in” the reel, set the hook with a downward sweep away from the weeds. Keep the rod tip low-some even stick half the rod under the surface-and start cranking after a bass is hooked. This is no place for whippy rods, lighter lines and any type of finesse. May the ‘best man” win…and often the big bass does. A low held rod helps keep the bass down, away from the thick floating vegetation that may cause tangles. Also be aware of shiners that just won’t swim under the vegetation very far. If they swim back out to open water several times discard them and re-bait. Lively shiners are absolutely necessary to pull out line far under the cover. And don’t buy hatchery raised shiners, as they don’t work nearly as well as wild, native shiners.

Although I learned this basic technique in Florida a number of years ago, it has plenty of applications in other parts of the country. Shiners can be run under thick blankets of surface-covering goop in the back end of a reservoir cove in Georgia, or under floating bogs in a Wisconsin flowage. This is also a deadly technique for crappies, walleyes or even pike under certain conditions. But tackle and bait adjustments have to be made for other species. Obviously, a “crappie minnow” isn’t going to pull 10 feet of 20-pound test under some matted cover, especially when stuck with a big hook.


Tail-hooked shiners under matted floating vegetation to reach bass
lurking in the shadows. This deadly Florida tactic will also work in the North.

Don’t spend a lot of time in one spot. If you don’t get any action after two runs-move. If the bass are there it’s very hard for them to resist a struggling tail-hooked shiner.

Key areas to target are back into slots or cuts, or under weedy points. The deeper the water under the cover the better. Isolated amounts of cover concentrate more bass in smaller areas. If the lake has a lot of floating cover, concentrate on a little deeper areas that the wind is blowing into, and where the cover coincides with visible wood or underwater structure such as a creek channel.

Just remember-set the hook downward and keep that bass coming toward the boat. It’s really an exciting and productive way to fish!

“Jumbo Jigs” – A New Trend in Jigging

Forget about “finesse” all the time! Savvy jig anglers are going to 5/8 to 1 1/2 ounce jigs to trigger strikes, and to achieve precision lure placement and absolute depth control.

The steep, rolling waves of Lake Erie were tossing our heavy fiberglass, 20-foot, boat around like it was a 10-foot aluminum johnboat. It was impossible to cast and retrieve a lure with any feel, and nearly impossible to stand in the boat. But what bothered me more than the high winds was the fact we were drifting past schools of big walleyes with ineffective presentations.

Out of desperation to reach the 25-foot depths and maintain some feel, I tried on a 1-ounce jig and baited it with a good-size minnow. After the jig was lowered to the bottom, my 6-foot graphite rod was set in a rod holder. More hard drifting with the jig being pulled fairly high off the bottom by the stiff graphite rod produced no takers. The drift speed was too fast and the jigs action was too violent in these cold waters of early spring.

To slow our drift speed, I began to run our motor into the wind, Not in an effort to move against it, but to reduce our drift speed. A “wind sock” would have accomplished the same task, had we brought one along.

The next move was to switch to a longer rod (7-foot) that had a softer action. The soft action would absorb some of the wave’s energy that was lifting the jig several feet off the bottom while the stiffer rod was used. A final adjustment was to put a stringer treble hook on the back of the jig. Normally this is done to hook short-striking fish, but in this instance the object was to hook fish via the wave action, as the small sharp trailing treble would easily barb them.

We began to re-drift the runs that showed fish on our sonar unit with renewed confidence. Strikes began coming almost immediately, as walleye after walleye were pulled over the gunnel of our boat. Our adjustments worked! It was just a matter of depth and speed control, something structure fishing guru Buck Perry has been preaching for many years.

Oversized, jumbo jigs have saved the day for me on many occasions. I’ve used them slow, fast, dressed with plastic, hair, live bait or combinations thereof. Big jigs are especially effective in deeper water, stronger currents, during faster drifts or when you want to maintain bottom contact while using a faster retrieve or trolling speed.

In recent years the trend has been more toward finesse presentations. Lighter lines, smaller lures and more “gentle” retrieves have been the rule. But fish usually are caught because they feed, strike or are protecting their nests. Certain lures provoke strikes. Crankbaits, spinner baits, and faster-moving surface lures are some top lures that trigger a fish’s predatory nature, thus causing them to react to (strike) a lure. Live bait, slow-moving plastics and standard, jig-type lures often tempt a fish into biting.

While jigs are generally thought of as finesse lures, they can also be worked fast to trigger strikes since they give you enough weight to maintain bottom contact under faster speeds. Heavier jigs add a new dimension to using live bait-enabling it to provoke strikes by more speed control. Lets examine some of the ways big jigs can help you catch more gamefish.

Walleyes

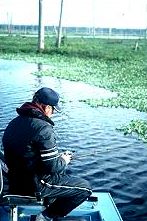
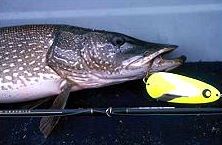
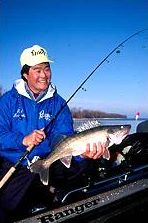
Walleyes are often found in deeper or fast moving waters, and no lure presentation can be worked with more precision and/or depth control than a big jig. When drifting over a deeper flat area the big jigs will pull your plastic or live bait offering right down to the bottom and keep it there. Then it’s a matter of fine tuning vertical action, drift speed, lure color and what’s put on your jig-plastic or live bait-to achieve maximum results.

Jumbo jigs also work great for walleyes and sauger when slow trolling along a structure or going against the current in a river. A boat that drifts down wind in a lake, or with the current in a river cannot be manipulated along precise edges very accurately, especially if tight turns exist. But if you slowly “backtroll” (run a smaller HP outboard motor in reverse against the wind) your boat can be slowly moved along a difficult-to-fish edge with more precision than can be achieved with any other control method. This slow accurate boat control method, combined with a near vertical presentation that allows you to feel out the bottom, is particularly deadly along erratic tough-to-fish edges (Note: “backtrolling” can also be accomplished by using a powerful bow-mounted electric motor. But be sure it has plenty of power and fully charged batteries).

While “line watching” plays a big part in most jig fishing, it’s not a big factor when jumbo jigs are used. You’ll easily feel the big dull thud when your 5/8 ounce or heavier jig pounds the bottom. Actually, these big jigs are like you eyes under the water, easily telegraphing back to you strikes, changes in bottom composition and cover. If you pay attention, you even be able to note subtle depth changes of a foot or two-even depressions in the bottom.

Ted Takasaki and John Campbell are two top walleye tournament anglers who have had outstanding success while trolling big jigs slowly up current in rivers. This innovative pair of anglers who captured the Masters Walleye Circuit “Team of the Year” honors in 1991, started out using heavy jigs as replacements for weights on 3-way rigs (river rigs) instead of the more commonly used bell-shaped sinkers. Soon they began catching walleyes and saugers on their “weights”, with the jig-caught fish usually being larger than the ones caught on the trailing live bait.

In shallower rivers that lack much structure, deeper runs in the 10 to 20 foot range often hold plenty of fish, especially there the river makes a broad, sweeping turn. While most anglers would work this stretch with a controlled drift and present a jig or Lindy Rig with live bait as vertical a possible, savvy river anglers would also “jumbo jig it”, while slowly motoring against the current.

Big jigs baited with large minnows present a large profile that appeals to out-size walleyes. Often this big lure worked in a fast manner is the only way to produce lunker walleyes under certain conditions.

Big jigs will reach bottom with the minimum amount of line out. This will give you great feel, lure placement and a way to totally control a lures action. You can hover over (by going into the wind or current) a few scattered deep rocks, short point, tight turn or sharp ledge and hold the jig inches above bottom while quivering the rod tip to entice a strike, or jump the lure sharply to provoke a reaction.


Stinger hooks are often helpful in hooking short-hitting fish.

Northern Pike

While large jigs dressed with plastics or big minnows have been touted as a top pike presentation in Fishing Facts for years, this was generally thought of a an early season presentation (in flatter areas) one used for following fish, or when casting into the weeds.

In the last few years trolling these big jigs just outside the weedline (or ripping through short deep fringe weeds), along deep drop-offs or across sunken clean humps, or into sharp turns has produced very well for me.

The key again is depth and speed control. I can put a larger jig right where I want it, control the action, have tremendous feel and hook a high percentage of strikes.

Most of my success has come along erratic edges that most anglers find hard to fish. The more points and sharp turns the better, and if a wind is pounding into the structure or edge making boat control difficult, I consider this a bonus.

My favorite big jig for this fishing is Lindy Little Joe’s Lil’ Hummer. This 5/8 or 1 ounce jig has a propeller that produces flash plus a lot of extra vibration that seems to attract and excite pike.


A Lindy Little Hummer jig worked fast along a deep weed edge triggered this big pike.

When fishing slower because the water is cold, or the pike are not too active, the jig will usually be dressed with a Fuzz-E-Grub body and baited with a large minnow. I’m also more apt to backtroll and use the 5/8 ounce model, working it with a gentle lift and drop motion. But if the pike are active and not over 20-25 feet deep, them the fun begins as I crank up the trolling speed by going forward, increase jig size and begin to rip the 1-ounce offering off the bottom. At this point a plastic dressing with more action would be preferred, such as a double Swirltail, 3 1/2 inch or larger tube jig, 4 1/2 inch Slug-Go or large plastic minnow with an “action tail”. If you still want to tip this faster lure presentation with live bait, the double Swirltail works best, as the twin tails flap along side the minnow.

In deep clear lakes pike often herd suspended baitfish such as ciscoes, shad, herring or tulibees into sharp corners or “inside turns” (opposite of a point-this where the deep water swings in toward shore). These conditions in the 20-50 foot depth range are almost impossible for the average angler to troll with any speed and live bait on a slip sinker rig is a slow process that won’t trigger strikes from non-feeding fish. It also results in hooking quite a few fish too deep for their own well being. But a one ounce or larger jig dressed with a hard-headed baitfish, and/or a glued on (Krazy Glue, Super Glue, etc.) plastic dressing can be worked slow, fast or somewhere in between with precision control on those hard to hit spots.

When fishing deeper than the major weed edge in a lake for pike, consider using large jigs with keel-shaped heads. The narrow profile on these heads allow the lure to easily cut throughout the water, making it the best design for deep water, currents or faster retrieves (or trolling speeds) while still maintaining bottom contact. The lures line tie will usually be set back from the jig’s tip, which makes this design more suited for use over cleaner bottoms.

Lake Trout

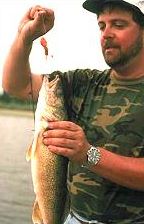
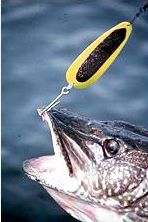
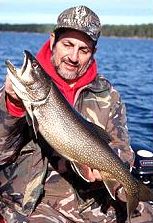
Many fishermen that travel into the north county for pike, walleyes and other species, often find that lake trout are also available. But these anglers often feel ill-equipped to pursue these denizens of the deep because they didn’t bring along any specialized gear for dredging the depths. But there is no need for wire lines, heavy weights, diving planes, downriggers an other cumbersome gear if you toss a handful of jumbo jigs into your tackle box.

During the warm months lake trout will school up around the deepest holes in a lake. You’ll find these hard-pulling trout where good structures such as deep shelves, points or humps are adjacent to at least 70-80 foot depths.

My plan of attack is to drift along the edges of these deep holes, from a structure out toward deeper water, or right across the hole if the depth isn’t too extreme (over 150 feet). Sometimes the fish are on bottom-sometimes they are suspended.

I usually start drifting from the top of a structure toward deeper water. The line is released off the reel so the big jig will plummet quickly toward the bottom. Once it reaches bottom the rate the line was peeling out will lessen. In calmer water this is easy to notice, but on windy days you must keep a watchful eye on the line. Once the jig hits bottom your retrieve begins.

Some successful deep water jig fishermen just reel the lure back to the boat at a moderate rate of speed. When the lure is in sight, the line is released and the scenario is repeated. Other anglers, such as myself, use a straight retrieve sprinkled with periodic pauses, twitches and short bursts of speed that help trigger following fish.

When fishing big jigs I generally use a Fuzz-E-Grub body and bait such as a strip of sucker meat (with skin attached), large minnow or strip of gullet cut off another fish. This short grub body adds a little bulk and color, and doesn’t interfere with the action of the live bait.

Tackle Tips

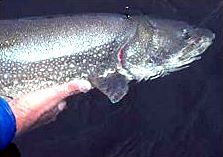
Although the big jigs can be fished effectively on “gutsy”, 6 1/2 to 7 foot spinning rods and 8 to 12-pound test lines, I tend to favor baitcasting gear for most situations. My favorite rod for handling jumbo jigs is either one of the 6 1/2 foot baitcasting rods in South Bend’s “System” series. This rods are the ideal length, have excellent power, great sensitivity and are inexpensive. They also have over 8-inches of handle behind the reel-great for extra relief and leverage when fishing.

A bait-casting reel with a smooth, dependable drag and a flipping mode is recommend. I can quickly let out line if the lure needs to drop down a ledge or depression while using only one hand, if the reel had flipping switch feature. Actually, you can easily slow troll with a powerful electric motor and use a rod in each hand, if the correct tackle is used.

When vertical jigging for lake trout the ultimate set up is to use a line counter reel so you know exactly the depth level where hits are occurring. This is a real bonus when fish are suspended. South Bend’s Vanguard Line Counter reels are perfect for vertical jigging. The smallest model will hold plenty of line for any freshwater situations.

I spool up my reels with good abrasion-resistant line such as Trilene XT, because of all the bottom bumping that takes place. In recent years I’ve spooled up with the new ultra-thin “super braided” lines when fishing extra deep water or when maximum feel was needed. Excellent success was achieved with Berkley’s FireLine and WhipLash in the 20 to 30-pound test range.

Jumbo jigs aren’t magic but they do give you another effective tool to add to your fishing arsenal. They allow you to fish faster, deeper in stronger currents and with maximum feel and lure placement. Don’t just think of using them in the ways I’ve outlined. What about for striped bass in the fast waters below dams? Or along the edges of deep holes in a river when baited with a large minnow for giant catfish? How about deep water muskies when dressed with an oversize plastic dressing? The uses are many. It’s time to get on the big jig bandwagon for more fishing success!

A Day to Remember!

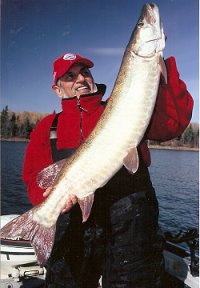
“Here we go again”, I thought as my partner Mike Zielonka put his third musky of the day into the net. Minutes later I finally connected with a nice fish. We were on our annual Lake of the Woods fall musky trip and Mike had seriously “big fished me” the last three years. Each year he has boated at least one fish over 50-inches, culminating with a 55 ½ inch monster in October of 2005.

All the big fish came on the outside lines; the ones running over deeper water. To troll safely and with the most accuracy with our tiller-operated boat, I face the shore to read the structures correctly and to avoid rocky out-croppings. I could move the boat out a little deeper and put myself on the deep edge, but my partner would have been over generally non-productive open water. My feeling is to make good trolling passes and who ever catches the fish catches the fish. It’s a team effort.

Generally on Lake of the Woods we run a 9-inch Grandma crankbait on the inside line, and a 10-inch Jake on the outside line. The Grandma runs deeper than the Jake, which gives us more space between our lures than if we were running the same lures. If we want deeper running lures, then the combination becomes a jointed Lindy Big M and a Depth Raider. Our line-counter reels are spooled with 80-pound test SpiderWire Stealth. A 3 to 4-foot braided wire leader that prevents the line from cutting on the rocks completes the set-up.

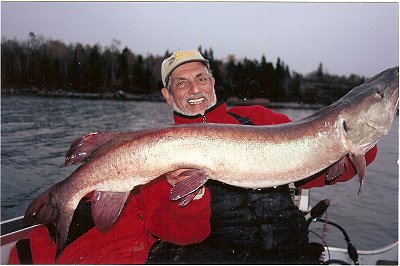
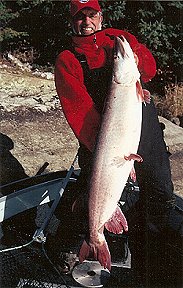
Day two started slow with me catching the first three fish, all under 37-inches. Then it started! The next was a chunky 44-incher, quickly followed by a 52-incher with the girth of a small barrel. It wasn’t a true 40-pounder, but a good-sized cisco would have put it close. About an hour before dark a 40 ½ incher slammed my Grandma. What a day 6 muskies, including a fat 52-incher.

I completed all the trolling runs I wanted to cover and decided to try a new area that looked promising. I hadn’t gone 100-yards when a hard strike doubled my rod. Within seconds wide sweeping head shakes and a lot of weight told me another big musky was on the line.

The cold water, stiff trolling rod and no-stretch line quickly sapped the big fish’s strength. Once in control I slowly slid the big fish into our large Beckman net, which Mike held quietly just below the surface. A quick measurement showed 50 ½ inches. What a day seven fish with two over 50-inches!

While this was our best day, the rest of the trip wasn’t too shabby. The two of us ended up boating 26 muskies and about 15 pike to 39-inches in 5 ½ days. It was a good trip but certainly not a fluke. In the 10 years I’ve making a fall trip to Lake of the Woods we’ve boated around 240 muskies in 77 days. October is a great time to go, because the trolling bite is hot and it’s a lot less tiring than casting during the long hot summer days.